
WEEK 8:
EMBEDDED PROGRAMMINGG
This week's development on embedded programming is a microprocessor or microcontroller-based system designed to perform one or a few dedicated functions.
The development environments group task:
Compare development and performance workflows for other architectures
the individual task
- Read the datasheet of your microcontroller
- Use your scheduler to schedule your board to do something
- Extra Credit: Try other programming languages.
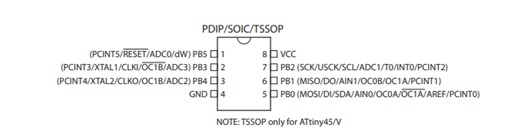
To develop this week's task, I had to carefully read the technical sheet of the ATtiny45 microcontroller provided by the manufacturer, where I found the specifications and datasheet of the microcontroller.

ATtiny 45 Pins
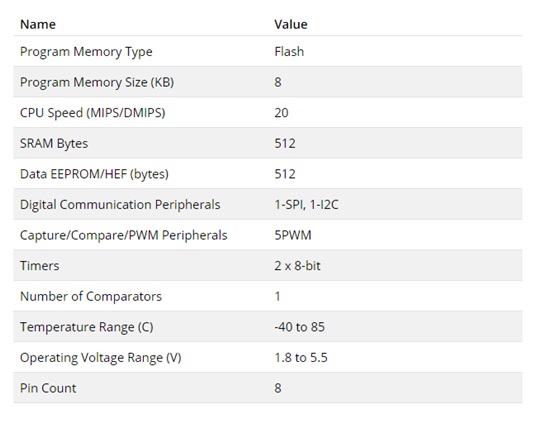
In the following table we can see the list of microcontroller parameters. Where we can highlight the 8kB of flash memory to save our program, 512 bytes of RAM memory, an operating voltage of up to 5.5 V, 2 timers and even PWM.
The microcontroller is based on Microchip's 8-bit high-performance, low-power AVR® RISC memory combines 4 KB ISP Flash memory, 256B EEPROM, 256B SRAM, six general-purpose I/O lines, 32 general-purpose work registers , an 8-bit timer/counter with compare modes, an 8-bit high-speed timer/counter, USI, internal and external interrupts, 4-channel 10-bit A/D converter, programmable watchdog timer with internal oscillator, three software-selectable power saving modes and debugWIRE for on-chip debugging. The device achieves a performance of 20 MIPS at 20 MHz and operates between 2.7 and 5.5 volts.
By executing powerful instructions in a single clock cycle, the device achieves performance close to one MIPS per MHz, balancing power consumption and processing speed.
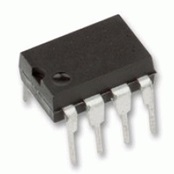
Attiny/25/45/85 Programming
Attiny/25/45/85 is a series of small micro-controllers from Atmel that will be useful for small projects in which many inputs/outputs or memory are not needed.
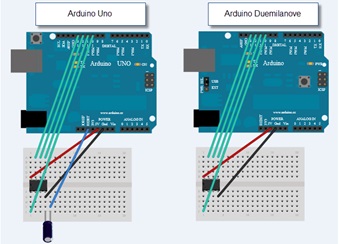
For programming we can use the Arduino desktop environment and as an interface for programming we can use a wrecker with Atmega328 (it doesn't work with 168) and as an Arduino uno or Arduino Duemilanove board.
The connection scheme would be the following for Uno we will need a 10uF capacitor:
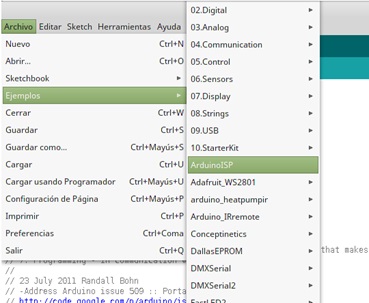
In the arduino environment we select the board we have and the port and load the scketch Examples/Arduino ISP.
Now we must prepare the arduino IDE to be able to program Attiny.
We download the necessary files from the Arduino-Atiny project depending on the version of IDE that we use.
Once downloaded, we unzip the file and copy its content to the "hardware" folder of our "sketchbook" folder (if it doesn't exist, we create it).
Inside the folders that we have extracted and copied, we will have to copy the file "sketchbook/hardware/tiny/Prospective Boards.txt" to "sketchbook/hardware/tiny/Prospective Boards.txt".
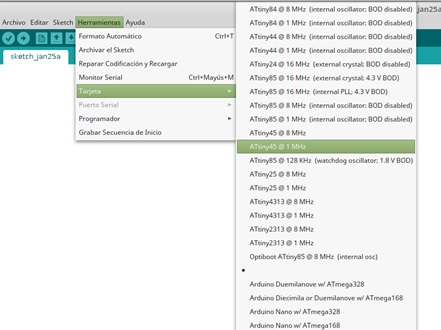
We close the arduino IDE if we have it open and we open it again and check that they have been loaded correctly by looking at "Tools / Card".
In IDE 1.0
In IDE 1.6
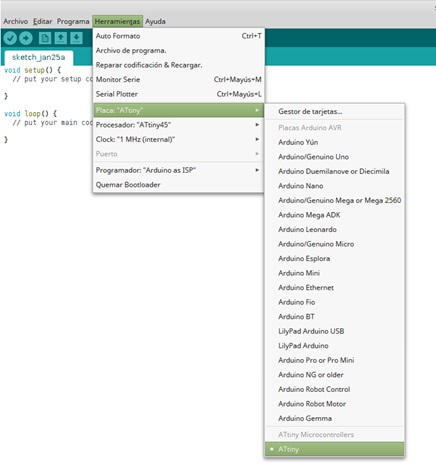
Now we can program our ATtiny with the Arduino IDE.